Prepare the development environment
We recommend Azure IoT Tools extension pack for Visual Studio Code to develop on the DevKit. The Azure IoT Tools contains Azure IoT Device Workbench to develop and debug on various IoT devkit devices and Azure IoT Hub Toolkit to manage and interact with Azure IoT Hub.
You can watch these Channel 9 videos to have overview about what they do:
- Introduction to the new IoT Workbench extension for VS Code
- What’s new in the IoT Toolkit extension for VS Code
Follow these steps to prepare the development environment for DevKit:
- Install Arduino IDE. It provides the necessary toolchain for compiling and uploading Arduino code.
- Windows: Use Windows Installer version. Do not install from the app store.
- macOS: Drag and drop the extracted Arduino.app into
/Applicationsfolder. - Ubuntu: Unzip it into folder such as
$HOME/Downloads/arduino-1.8.8
-
Install Visual Studio Code, a cross platform source code editor with powerful developer tooling, like IntelliSense code completion and debugging.
-
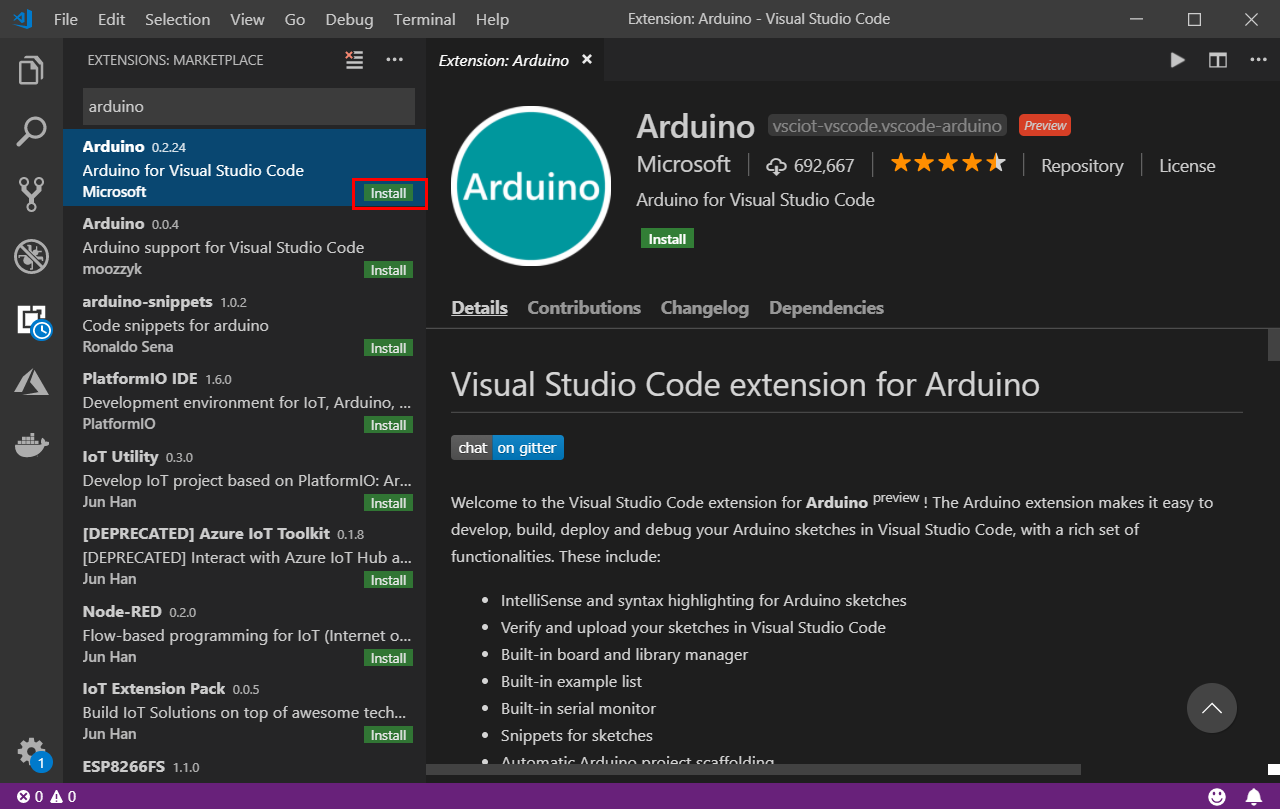
Launch VS Code, look for Arduino in the extension marketplace and install it. This extension provides enhanced experiences for developing on Arduino platform.
-
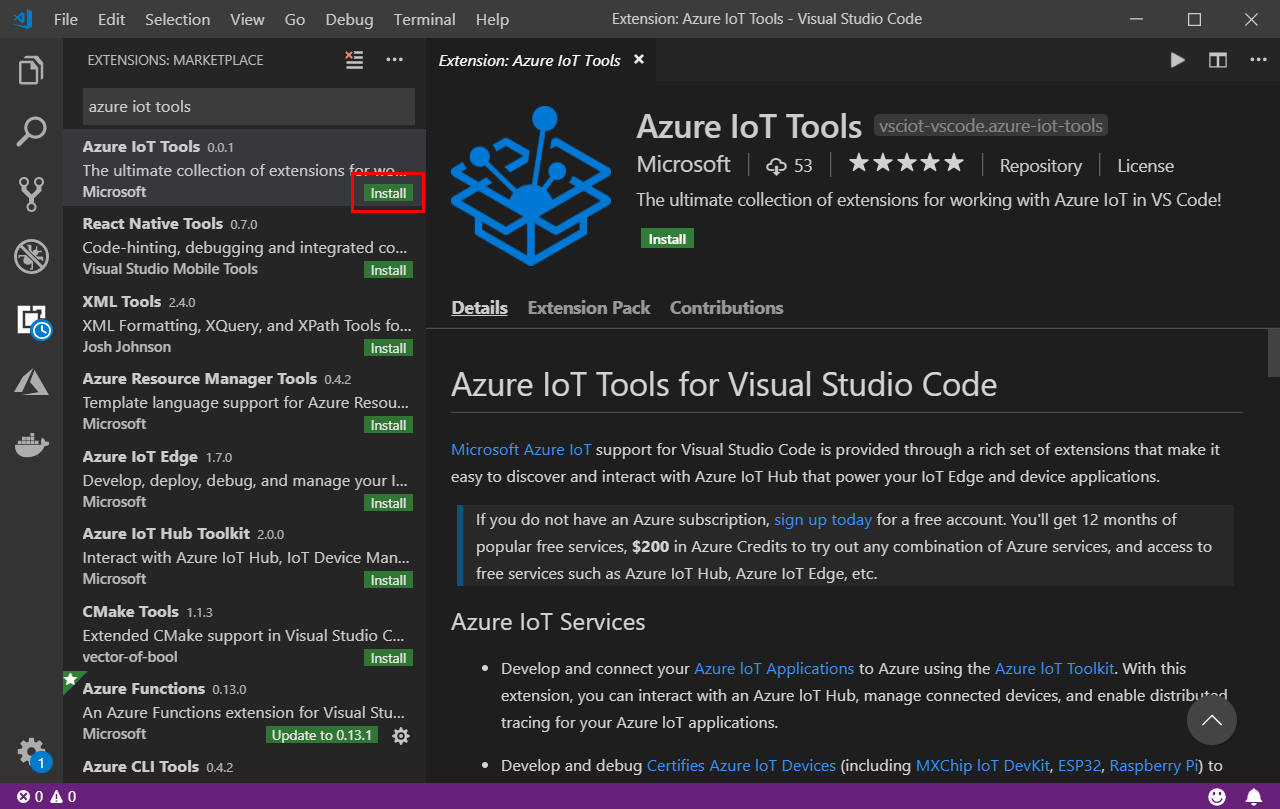
Look for Azure IoT Tools in the extension marketplace and install it.
-
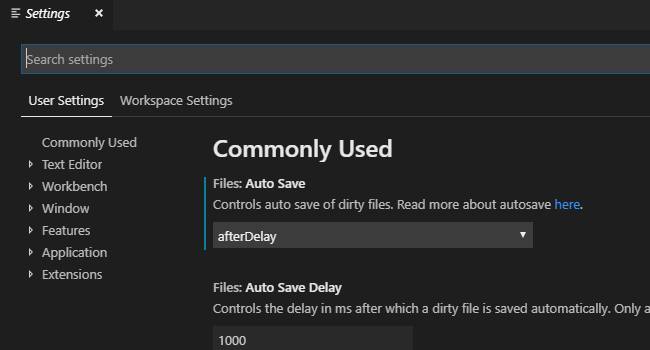
Configure VS Code with Arduino settings.
In Visual Studio Code, click File > Preference > Settings.
Type “Arduino” in the search textbox, the Arduino:Additional Urls is showed up, then click the hyperlink ‘Edit in settings.json’.
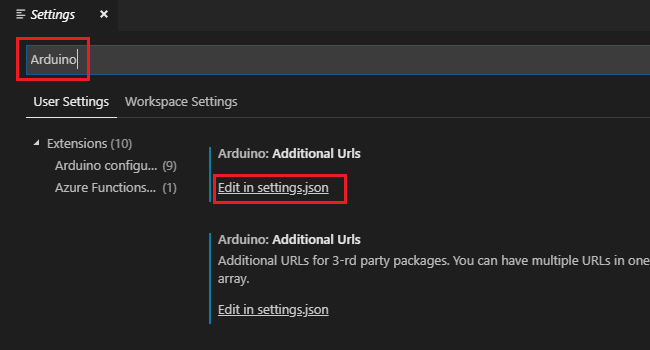
Make sure the
"arduino.path"and"arduino.additionalUrls"have been set correctly, if not please add following lines to configure Arduino depending on your platform:-
Windows:
"arduino.path": "C:\\Program Files (x86)\\Arduino", "arduino.additionalUrls": "https://raw.githubusercontent.com/VSChina/azureiotdevkit_tools/master/package_azureboard_index.json" -
macOS:
"arduino.path": "/Applications", "arduino.additionalUrls": "https://raw.githubusercontent.com/VSChina/azureiotdevkit_tools/master/package_azureboard_index.json" -
Ubuntu:
Replace the {username} placeholder below with your username.
  "arduino.path": "/home/{username}/Downloads/arduino-1.8.8",
  "arduino.additionalUrls": "https://raw.githubusercontent.com/VSChina/azureiotdevkit_tools/master/package_azureboard_index.json"
-
-
Click
F1to open the command palette, type and select Arduino: Board Manager. Search for AZ3166 and install the latest version.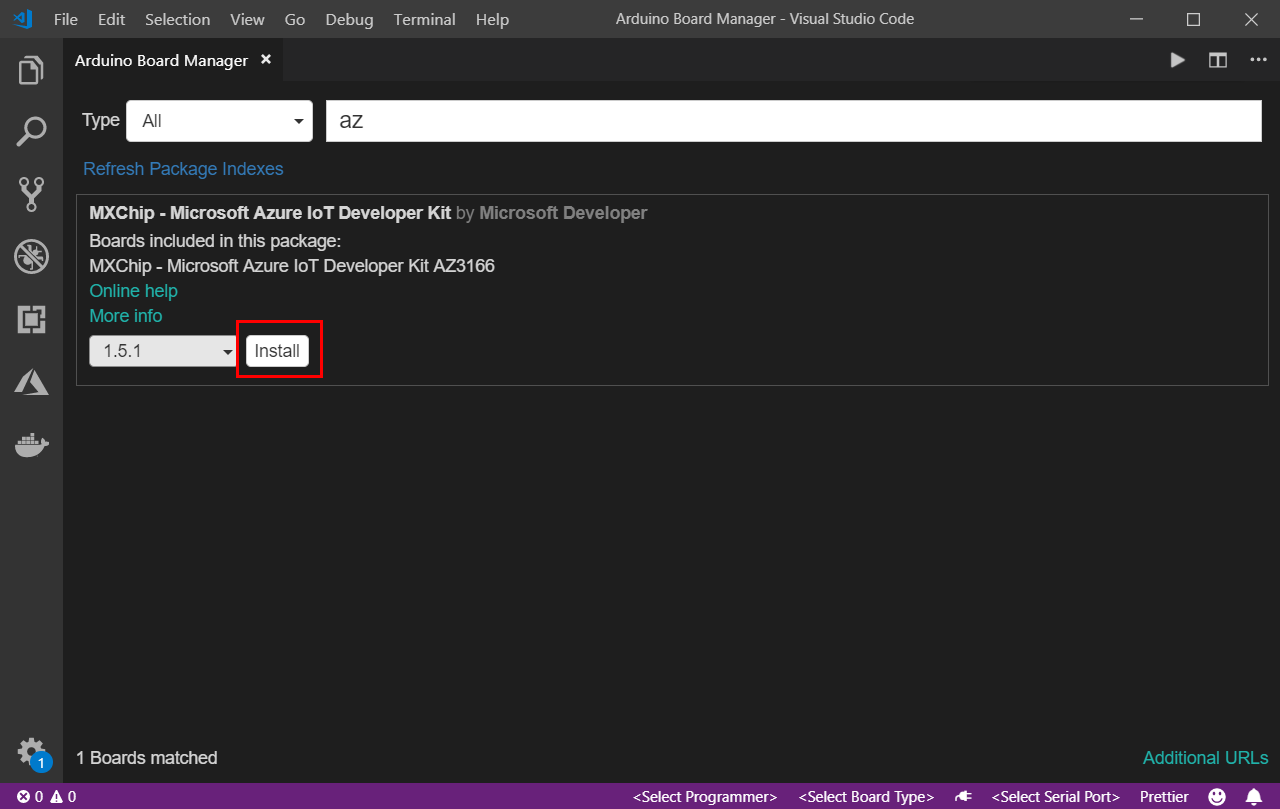
Install ST-Link drivers
ST-Link/V2 is the USB interface that IoT DevKit uses to communicate with your development machine. Follow the OS-specific steps to allow the machine access to your device.
ST Link driver for windows - my copy without signin
- Windows: Download and install USB driver from STMicroelectronics website.
- macOS: No driver is required for macOS.
-
Ubuntu: Run the following in terminal and log out and log in for the group change to take effect:
  # Copy the default rules. This grants permission to the group 'plugdev'
  sudo cp ~/.arduino15/packages/AZ3166/tools/openocd/0.10.0/linux/contrib/60-openocd.rules /etc/udev/rules.d/
  sudo udevadm control --reload-rules

  # Add yourself to the group 'plugdev'
  # Logout and log back in for the group to take effect
  sudo usermod -a -G plugdev $(whoami)
Now you are all set with preparing and configuring your development environment. Let us build the “Hello World” sample for IoT: sending temperature telemetry data to Azure IoT Hub.
Create your first project
-
Make sure your IoT DevKit is not connected to your computer. Start VS Code first, and then connect the DevKit to your computer.
-
Click
F1\Shift+Ctrl+Pto open the command palette, type and select Azure IoT Device Workbench: Create Project …. Provide project name. Choose Arduino as Project base, then select MXChip IoT DevKit as template (only device code). -
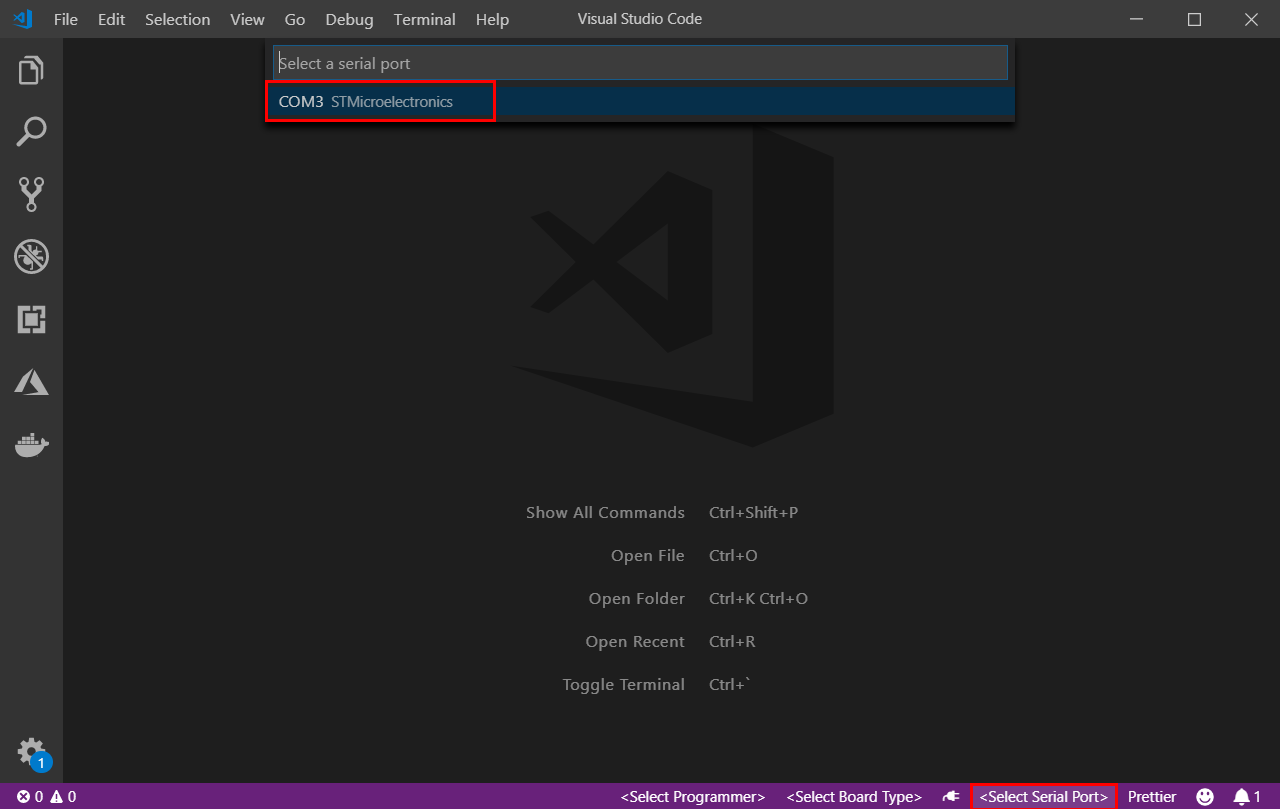
In the bottom-right status bar, check the MXCHIP AZ3166 is shown as selected board and serial port with STMicroelectronics is used. If it is not listed Refresh Pagckage Indexes
-
Click
F1again, type and select Azure IoT Device Workbench: Upload Device Code. It starts compile and upload the code to DevKit. Or select Arduino: Verify for compile and Arduino: Upload to upload the code to DevKit.